Showing posts with label card. Show all posts

Tuesday, 8 August 2017

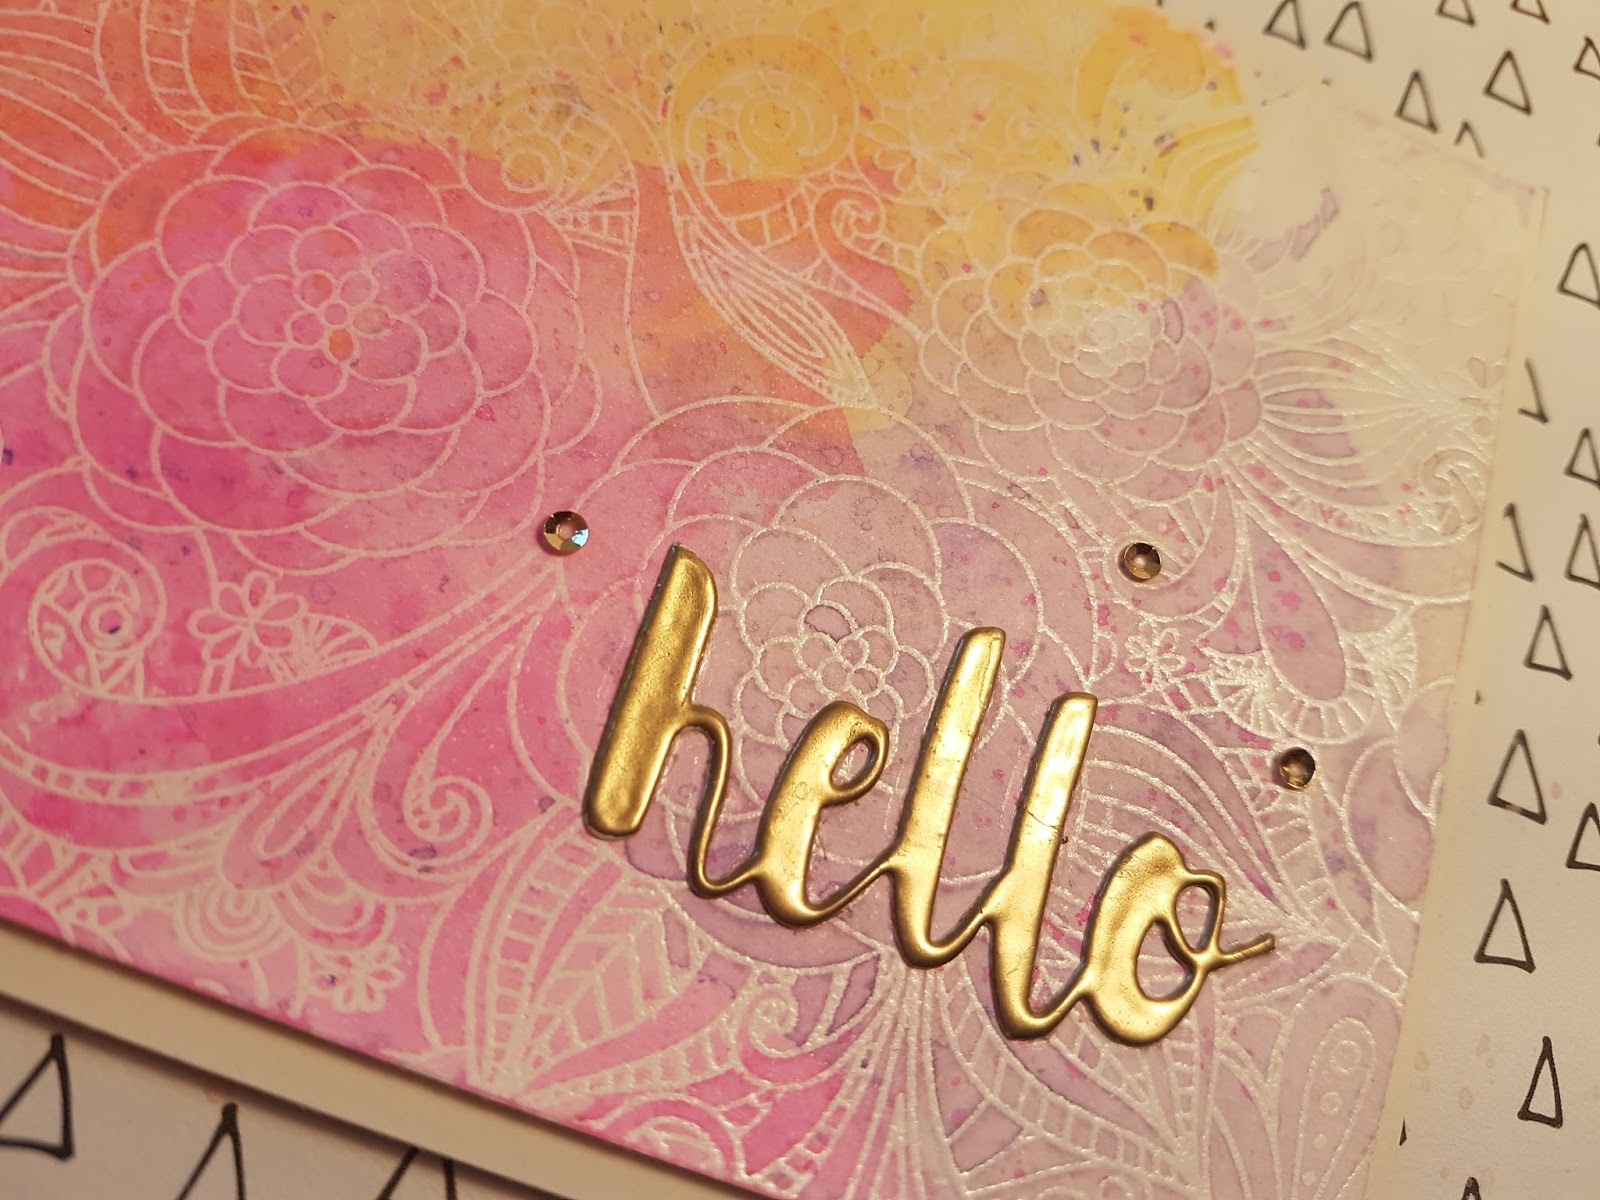
Hello card - My first card-making video!


Hi! Today I have a new card to share with you along with its video making! Yeeeahh! 😊

There are many reasons why I love card-making. One of them is that each card is a small project that can be finished quite quickly. Of course this holds if you have already decided what you are going to create and everything goes as planned! The second reason is that there are many different styles of card to try making and thus you can never get bored with it! There are also several techniques to try, learn and keep it if you like it or not.

For this card I use embossing (with embossing powder) & ink smooshing techniques, which I really like for card-making.

Here are some close-ups of the card:


You can watch the whole card-making video of the card at my Youtube channel:


Hope you like it! Thank you for watching! 💖

Supplies list: 


* background stamp: Floral Fantasy, My Favorite Things
* embossing ink: VersaMark
* embossing powders: white, WOW - gold, Zing!
* Tombow markers: #623, #725, #025
* die: Painted Hello, Simon Says Stamp


Sunday, 28 February 2016

Card - Time to Celebrate!


Hi! Welcome to my blog!

It's been a long time since I last posted a new project (although I've been making them!) and I feel totally out of rhythm here! But...I hope that it will all come back to me and that I'll manage to post everything new that I have. 

Today I have a new card, which combines some of my favorite techniques, like ink blending, embossing, use of vellum and a seam binding bow! It is quite easy to make, and it is a card that can be used for many festive occasions like birthdays, name days,  anniversaries, graduations and more!
So, if you like it don't hesitate to try making it!


For the background, I used the background stamp with embossing ink and then I embossed it with golden embossing powder. Then, I used three distress inks (mustard seed, wild honey and aged mahogany) to create the ombre effect using the Ranger's round ink blending tools.


I cut a strip of vellum to use as banner, I stamped my sentiment with black archival ink on the vellum and embossed it with clear embossing powder. I've placed it on my background panel, folded it over the edges and adhered it at the backside. This way the glue doesn't show through the vellum. 


Then, I made a double bow with seam binding ribbon at matching color and adhered it on the vellum banner.


Finally, to embellish it a little more, I placed some pearl gems close to the sentiment. I adhered the main card panel to a white card base and my card was ready! Quite easy, isn't it?!

I hope you like my new card. Thank you for visiting my blog, I'll be happy to get your comments!

LIST OF SUPPLIES:


Saturday, 10 October 2015

Card - Happy Halloween!


Hello dear friends and welcome to my blog!

Today I have a Halloween card to share with you! And it is quite special to me as in my country, Greece, we don't celebrate Halloween, but I love the Halloween theme and its colors and I love this card!

For the background I've used dusty concord Distress ink, using a circle mask made with the stitched circles die, to prevent coloring the space of the moon. After removing the mask, I used old paper Distress ink to lightly color the moon and to create the spooky clouds! 
I hand-cutted a piece of cardstock and painted it with brown Tombow watercolor pen to use it for the hill ground. I also stamped with potting soil Archival ink the plants on the background from the Docrafts the collector stamp set.


The pumpkin and the cute cat were stamped with the SSS Hey pumpkin stamp on watercolor paper and then colored with Tombow watercolor pens. After that, I hand-cutted the colored image, created its shadow with walnut stain Distress ink and glued it on the page. I've also used Distress crackle paint over the pumpkin to give it a more frightening look!


I have also created the spider web with its spider with a permanent black pen.


Finally, I've stamped the sentiment from the previous SSS stamp set over the moon and drew a spider coming down from it again with black permanent pen.


I love how this card came out, spooky and cute! Hope you like it too! I'll be happy to get your comments or questions.


SUPPLIES:


Thank you for visitng my blog!


Monday, 6 July 2015

Card - Coffee Lover!


Dear friends, hi! Welcome to my blog!

After moving our home and trying to put everything in its new place, I, finally(!), managed to make some time for a new card! Our new home still needs a lot of work and time to become completely and entirely functional, but hey! my craft place is quite ready and I really need my creative time to relax and be happy! 

For a long time I wanted to create a watercolor background for my card but for some reason I couldn't make one that I really liked. After watching many video tutorials on how to make a watercolor background and trying different techniques, I believe I've found the one that works for me! 
So here is my new card with the watercoloring background! 

(click on the photos to zoom)

The process for creating this card is the following:

1. To create the watercolor background I've adhered my watercolor paper onto a thick cardboard, using removable paper tape, to avert paper buckling. With a big brush, I watered all the paper surface. I placed, on a transparency, ink from two Tim Holtz Distress ink pad colors, the Worn Lipstick and the Shabby Shutters, sprayed a little water on them, and with a smaller brush I started picking ink and placing it onto the watered paper. I've tried to avoid blending the two colors together since this would result in a muddy brown color! After my first layer of colors I heat setted the colors with my heat gun. I continued to place ink on the paper and heat-setting until I was satisfied with the result. Then I removed the paper tape which left the white border on the paper. I have seen this technique of watercoloring from the amazing Kristina Werner and you can watch a sample of her watercoloring background process here.

2. Using the Potting Soil Archival Ink, I stamped two images from the Prima Coffee Break Cling stamp set, onto some patterned paper from the Lost & Found paper collection of My Mind's Eye, and fuzzy cutted them.

3. I used a matching colored ribbon to make a bow on the handle of the coffee pot.


4-5. The cup stamp that I've used comes along with a sentiment and some coffee steam, thus, I have masked it with some post-it notes in order to stamp on the background only the cup and the steam of the coffee. I also stamped the coffee pot. 

6. I made a banner with some polka dot paper from the same paper collection, where I have stamped with the Potting Soil Archival Ink the sentiment and some coffee seeds from the previous stamp set. I've also used ZING Clear embossing powder to emboss the sentiment. 

7. I adhered my cutted images of the cup and the pot on the stamped ones, using Galleria Matte Medium for the cup and adhesive foam tape for the coffee pot to add some dimension to the card. I used a watered brush and ink from the Tombo Art watercolor marker 969 to make some shadow around the cup and under the pot. 

8. To add some details on the card, I glued three matching green gems and used the ZIG Wink of Stella Glitter Clear marker on the pot's dots.

9. Finally, I punched and inked with Worn Lipstick distress ink a small heart, I glued it on the banner and placed the banner with the sentiment on the bottom of the card using adhesive foam tape.

And here are some close-ups of the card.


And an other final view!


That was my card for today, I hope you like it! I would be happy to get your comments or any questions! 

With this card I participate into the Simon Says Stamp Wednesday Challenge "We're Going Dotty!"!

Thank you for visiting my blog!


Tuesday, 7 April 2015

Card - Happy 6th Birthday!


Hi! Welcome to my blog!

Today I share with you a card that I made for Simon Says Stamp Wednesday Challenge blog 6th birthday! I wanted this card to be really joyful and festive, so I picked up some bright colors and imagined of a happy celebration and...this is what I came up with! 


I love celebrations with balloons and fireworks in country areas and I tried to bring that on my card! 
The numbers on the balloons are for the six celebrating years of the blog, they were embossed on the balloons with white embossing powder and they were embellished with glitters! (glitters don't really show up well on the photos).


And as I love banners, I made a triple small one with a heart to emphasize the "happy" part of my sentiment and...


a bigger one for the word "Birthday". This bigger one is attached on the card pannel with foam tape to bring some dimension onto the card. Also, it is glued on the balloon with the number "6" as this is the year of the celebration! 


Sooooo! HAPPY 6th BIRTHDAY to the SSS Wednesday Challenge blog and its Design Team, thank you for all the challenges, the inspiration, the spotlights and the giveaways all this time, wish you all the best with many many challenging events to come! Happy Celebrating!

With this card I participate to the "Happy Birthday" challenge of the Simon Says Stamp Wednesday Challenge blog!

That was my card for today, I hope you liked it! I'll be happy to get your comments or any questions. Thank you for visiting!


Friday, 27 March 2015

Card - Spring Happy Birthday!


Hi, welcome to my blog!

Today I have another birthday card to share with you! Although I have used paper cuts from an autumn collection, white, orange, green and brown colors remind me of spring and I love to call this card spring happy birthday card! This card was inspired by the amazing Kristina Werner. Kristina is a professional graphic designer and papercrafter and I really love her work! You can find her original card here.

Making this card was quite a challenge to myself, as I had to try many alternative techniques, some totally new to me. The first alternative technique was making the embossed background not with an embossing folder but with a stencil. For this one, I used my Big Shot machine by placing one cutting pad, a sheet of felt, my cardboard, the stencil and on the top the second cutting pad. I love the embossing result! 

(click on the photos to enlarge)

For the fox and the fawn, I stamped them on watercolor paper and colored them using distress inks and a water brush and watercolor markers. This was my second try for watercoloring stamped images (you can find my first attemp here) and I have to admit that I'm not quite satisfied yet. But we all need to try, right?! After coloring the images, I hand-cutted them and colored the white edges.


I made the sentiment by stamping with brown archival ink on velum and embossing it with clear embossing powder. Archival ink isn't the best choice for stamping on velum but as I didn't have a brown StazOn ink or a brown embossing powder, I had to use it and it hold quite well on the velum. 


For the shaker window, I have used two sizes of scallop circle dies to cut the paper border. In order to achive depth for the window, I have also die cutted with the dies a piece of foam sheet and glued it under the paper border.


For the content of the shaker window, except from the ordinary sequins, I love using other small things that I can fit inside, like wood veneer embellishments, small paper die cuts, and beads.


With this card I participate in the challenge "Anything Goes" of the Simon Says Stamp Wednesday Challenge blog!


That was my card for today, I hope you liked it! I would be happy to get your comments or any questions. Thank you for visiting!


PRODUCTS LIST:

  • Sizzix Big Shot machine
  • Sizzix Circles, Scallop 8 dies
  • Memory Box Scraped Paint Stencil
  • Bo Bunny 6x6 paper pad Autumn Song Collection
  • Lawn Fawn Clear Stamps Into the Woods
  • Ranger Distress Ink spun sugar, tea die, walnut stain
  • Tombo ABT markers 899, 977
  • Ranger Archival Ink Potting Soil
  • Zing! Embossing Powder Clear
  • Hero Arts "Find Joy" Clear Stamp Set
  • Simon Says Stamp White Cardstock
  • Ranger Tim Holtz Distress Watercolor Cardstock
  • Doodlebug Design doodle twine take note
  • Studio Calico Wood Veneer Shapes Tiny Stars
  • Martha Stewart Flower Shower Punch Around the Page Set
  • Moon Shaped and Circular Sequins
  • Velum


Saturday, 14 March 2015

Card - You're the greatest!


Hi! Welcome to my blog! 
Today I have a new card to show you and this one is of romantic style! My mom loves romantic and shabby chic style and this one is for her!  If you would like to make a similar card, the how-to-steps for making it are the following:

1) Use a watercolor cardstock, stencil with white modelling paste your favorite background pattern and let it dry.

2) Apply with a brush two or three matching watercolors on the background, spray it with water and let dry. You can repeat this step until you are satisfied with the background coloring. Make a border to the background with a watercolor too.

(click on the photos to enlarge)

3) Make your focal point like a heart, a butterfly, a flower etc. using patterned paper of matching colors, attach it on your background using foam tape, make a sentiment banner and place it on it too. You can embellish it more if you feel like it by coloring it and using some gems.


4) Use some of the background colors to color a ribbon and tie it into a bow. Use some embellishments like twine and brands and attach it on your card.


5) Glue your card panel on a cardstock and you're finished! Here is the resulting card again! I hope you like it!


Thank you for visiting, I'll be happy to get your comments!

PRODUCTS LIST:
  • Simon Says Stamp White Cardstock
  • Ranger Tim Holtz Distress Watercolor Cardstock
  • Galeria Modelling Paste
  • Ranger Tim Holtz Distress Ink - old paper / worn lipstick / scattered straw
  • Tim Holtz idea-ology - Crinkle Ribbon
  • The Crafters Workshop 6x6 Stencil - Mini Peacock Feathers
  • My Mind's Eye 6x6 paper pad - Lost & Found
  • Elle's Studio Sentiment Tags
  • Ranger liquid pearls - Flamingo


Saturday, 7 March 2015

Card - You mean so much to me!

Hello! Welcome to my blog!

Today I have a new card to show you. This one comes out very late, as it was made for the Valentine's day, but you know what? We can give a card to our loved ones everyday and not just for the Valentine's day, right?!

What I sometimes find difficult to make, is to combine a love and appreciation theme of card, with a masculine style. So this card started with a white cardstock base but it looked so...not masculine! And then, as my hubby's favorite color is black, it 'hit' me. Let's introduce some black here! Then, it all came out easily. The black background would match perfectly with a combined black banner, and this is the result!

(click on the pictures to enlarge) 

I love the texture of the red painted modelling paste!


I have also used a matching brad that says "you're my treasure" and a bow made from thick twine.


And here is an other view of my love-masculine card!


I hope you like it and got inspired to make yours! I would be happy to get your comments or answer your questions. Thank you for visiting my blog!

PRODUCTS LIST:
  • Simon Says Stamp white cardstock 
  • Black canson paper
  • Galeria modelling paste
  • Martha Stewart "habanero" satin acrylic paint (red paint)
  • Prima "Stationer's Desk" paper pad
  • Lawn Fawn "Peace Joy Love" paper pad
  • Bo Bunny "Altitude Collection" paper pad
  • Thick twine (from handware store)
  • Prima "Stationer's Desk" brads
  • Simon Says Stamp "Postage Stamp Edge Frames" Craft Dies
  • WOW Opaque bright white embossing powder 
  • Hero Arts "Find Joy" clear stamp set
  • Lawn Fawn "Into the Woods" clear stamps


Monday, 12 January 2015

Happy New Year & Card - Winter Birthday Card!


Welcome to my blog and...


HAPPY NEW YEAR!!! 


Wish you a happy and creative new year, full of joy and peace!


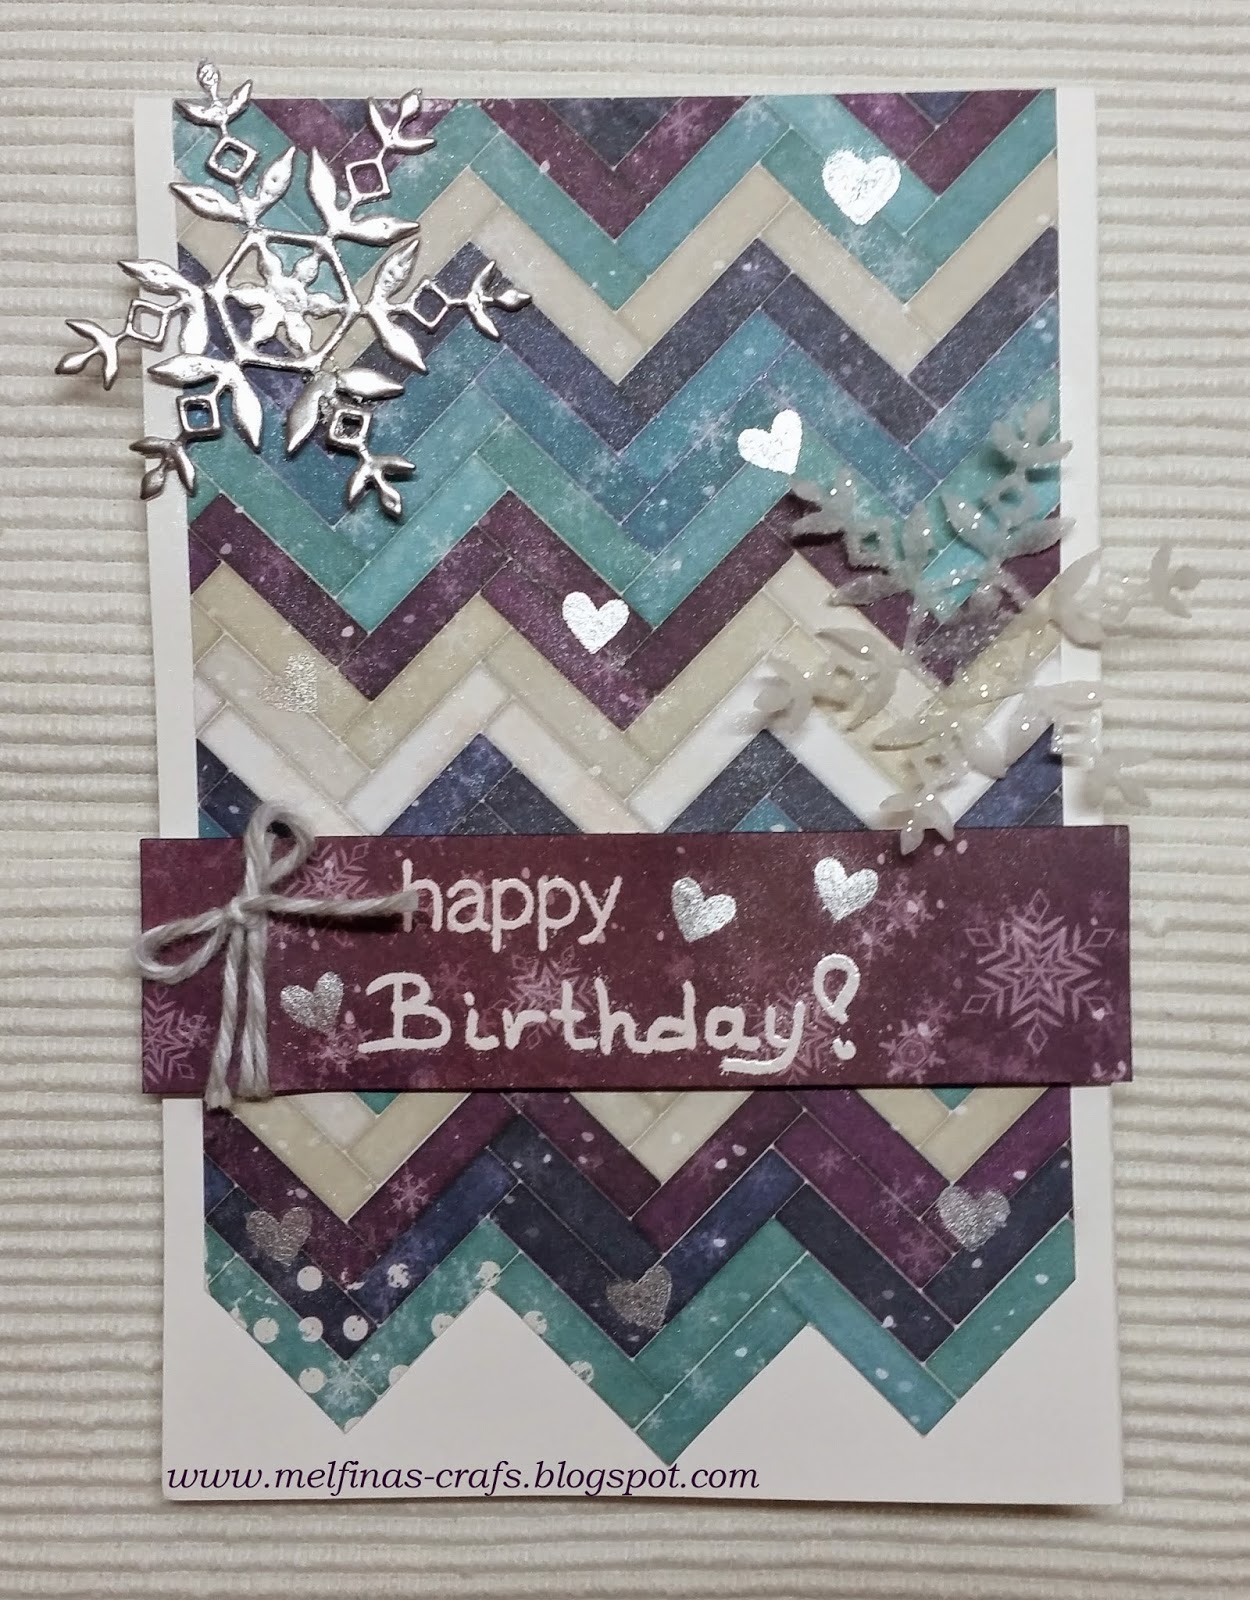
Well, this is my first blogpost of the year and I have a Winter Birthday card for you! The background paper is from the Bo Bunny Altitude Collection and I love it, as it has all my favorite winter colours! 


To embellish my card, I used two die cutted snowflakes. For the left one, I used paper which then I embossed with silver embossing powder. I also used grey-white doodle twine to make a bow which coordinates with the card colours. 


The right snowflake was die cutted on velum which then was embellished with glitter. I love its frosty look!


For the sentiment I made a paper banner for the same paper collection, on which I embossed my wish, and then glued it with foam tape on the background. I also used a heart shaped stamp and perfect pearls to make the little shinny hearts all around!


That was my card for today, I hope you like it! I'll be happy to get your comments!

PRODUCTS LIST:

  • Bo Bunny 6x6 paper pad altitude collection
  • Doodlebug doodle twine "take note assortment"
  • Simon Says Stamp Kate Snowflake die
  • Simon Says Stamp white cardstock
  • Ranger embossing powder silver
  • Ranger Tim Holtz Distress Glitter clear rock candy
  • Ranger Perfect Pearls perfect pearl
  • Ranger Emboss It Pens
  • Lawn Fawn Trim the Tree clear stamps set


Thursday, 24 July 2014

Card - Happy summer time!


Καλωσήλθατε στο blog μου! 
Κατακαλόκαιρο πια και δεν θα μπορούσε να υπάρξει μεγαλύτερη έμπνευση από τον ήλιο και την θάλασσα! Η νέα μου κάρτα εκτός από άκρως καλοκαιρινή, είναι επίσης και shaker card (η πρώτη μου!).

Welcome to my blog! 
We are in the middle of the summer and there couldn't be more inspiration than that from the sun and the sea! My new card except from totally summery is also a shaker card (my first one!).


Για το χρώμα και το εφέ των κυματισμών στο φόντο πίσω από το "παράθυρο" της κάρτας χρησιμοποίησα distress paint ακρυλικό χρώμα πιέζοντας και κινώντας κατάλληλα το σφουγγαράκι ώστε να δημιουργήσει αυτό το αποτέλεσμα.

For the colour and the wave effect on the background behind the "window" of the card, I have used distress paint and pressed and moved the sponge properly to create this result. 


Και μια όψη του κειμένου της κάρτας από κοντά!

And here is a view of the sentiment, made using the SSS "happy" die cut and some alphabet stamps!


Με αυτή την κάρτα συμμετέχω στην πρόκληση "A mid-s
ummer's challenge..." στο
Simon Says Stamp Monday Challenge blog!
Ευχαριστώ που επισκεφθήκατε το blog μου! Καλό καλοκαίρι σε όλους!

With this card I'm taking part to the challenge"A mid-summer's challenge..." at: 
Simon Says Stamp Monday Challenge blog!

Thank you for visiting my blog, I'll be happy to get your comments! Happy summer-time to all!

Friday, 3 January 2014

Card - Season's greetings 2!

Καλή Χρονιά σε όλους με υγεία, χαρές και πολλές πολλές δημιουργικές στιγμές!!! Σήμερα έχω να σας δείξω ακόμα μια εορταστική & χειμωνιάτικη κάρτα! Σκόπευα να την έχω έτοιμη νωρίτερα αλλά με τις γιορτές και τα σχετικά τρεξίματα δεν πρόλαβα...!

Happy New Year!!! I wish you all to have many many happy & creative moments! 
Today I have one more season card to show you. I intended to have it completed  earlier but due to all the festive holidays and preparations I didn't make it... So here it is!


Η συγκεκριμένη κάρτα είναι η πρώτη μου προσπάθεια για ζωγραφική της σφραγίδας με μαρκαδόρους νερού. Ομολογώ ότι δυσκολεύτηκα στην αρχή, αλλά είμαι αρκετά ικανοποιημένη από το τελικό αποτέλεσμα και τώρα ξέρω τι πρέπει να προσέξω την επόμενη φορά!

This card is my first try to stamp coloring with water-based markers. I have to tell you that it was difficult at the beginning, but I'm quite satisfied with the result and now I know what I need to be careful with this technique the next time!


Εδώ φαίνεται από πιο κοντά η ετικέτα με τις ευχές. Η ετικέτα είναι κολλημένη με ταινία αφρού και έτσι δίνει άλλη μια διάσταση στην κάρτα.

Here is a closer view of the greetings label. The label is adhered with foam pads which give one more dimension to the card.


Η χιονονιφάδα είναι κομμένη σε ριζόχαρτο στο οποίο έχει κολληθεί glitter που της δίνει λάμψη!

The snowflake is die cutted on vellum and on top I have adhered glitter which make it shine!


Ευχαριστώ που επισκεφθήκατε το blog μου! Ελπίζω να πήρατε ιδέες για τις δικές σας δημιουργίες. Αν έχετε οποιαδήποτε ερώτηση σχετικά με τις κατασκευές σε αυτό το blog μπορείτε να αφήσετε σχόλιο ή να μου στείλετε email, θα χαρώ πολύ να σας απαντήσω!

I hope you liked my card and got ideas for your creations! I'll be happy to get your comments. If you have any question on my creations, leave me a comment or send me an email and I'll answer you as soon as possible! Thank you for visiting my blog!

Sunday, 1 December 2013

Card - Season's Greetings!

Γεια σας και καλό μήνα! Μένουν μόνο 24 ημέρες για τα Χριστούγεννα και έτσι σήμερα έχω έτοιμη να σας δείξω την δεύτερη χειμωνιάτικη & εορταστική κάρτα μου! Η συγκεκριμένη κάρτα είναι από τις πολύ αγαπημένες μου γιατί συνδυάζει σχεδόν όλες τις τεχνικές που μου αρέσει να χρησιμοποιώ όπως ζωγραφική, embossing (ανάγλυφη αποτύπωση), σφράγιση και paper cutting. Ελπίζω να σας αρέσει!

Hello & happy December to all! We have just 24 days until Christmas, so today I have my second season's card ready to show it to you! This card is one of my favorites as it combines many from the techniques I love to use, like inking, embossing, coloring, and paper cutting! Hope you like it!


Και μια πιο κοντινή άποψη...

And this is a more detailed view...


Με αυτή την κάρτα λαμβάνω μέρος στην πρόκληση "ANYTHING GOES" στο
Simon Says Stamp Wednesday Challenge blog! 
Ευχαριστώ που επισκεφθήκατε το blog μου!

Thank you for visiting my blog, I'll be happy to get your comments! 
With this card I'm taking part to the challenge "ANYTHING GOES" at: 
Simon Says Stamp Wednesday Challenge blog!