Showing posts with label techniques. Show all posts

Tuesday, 8 August 2017

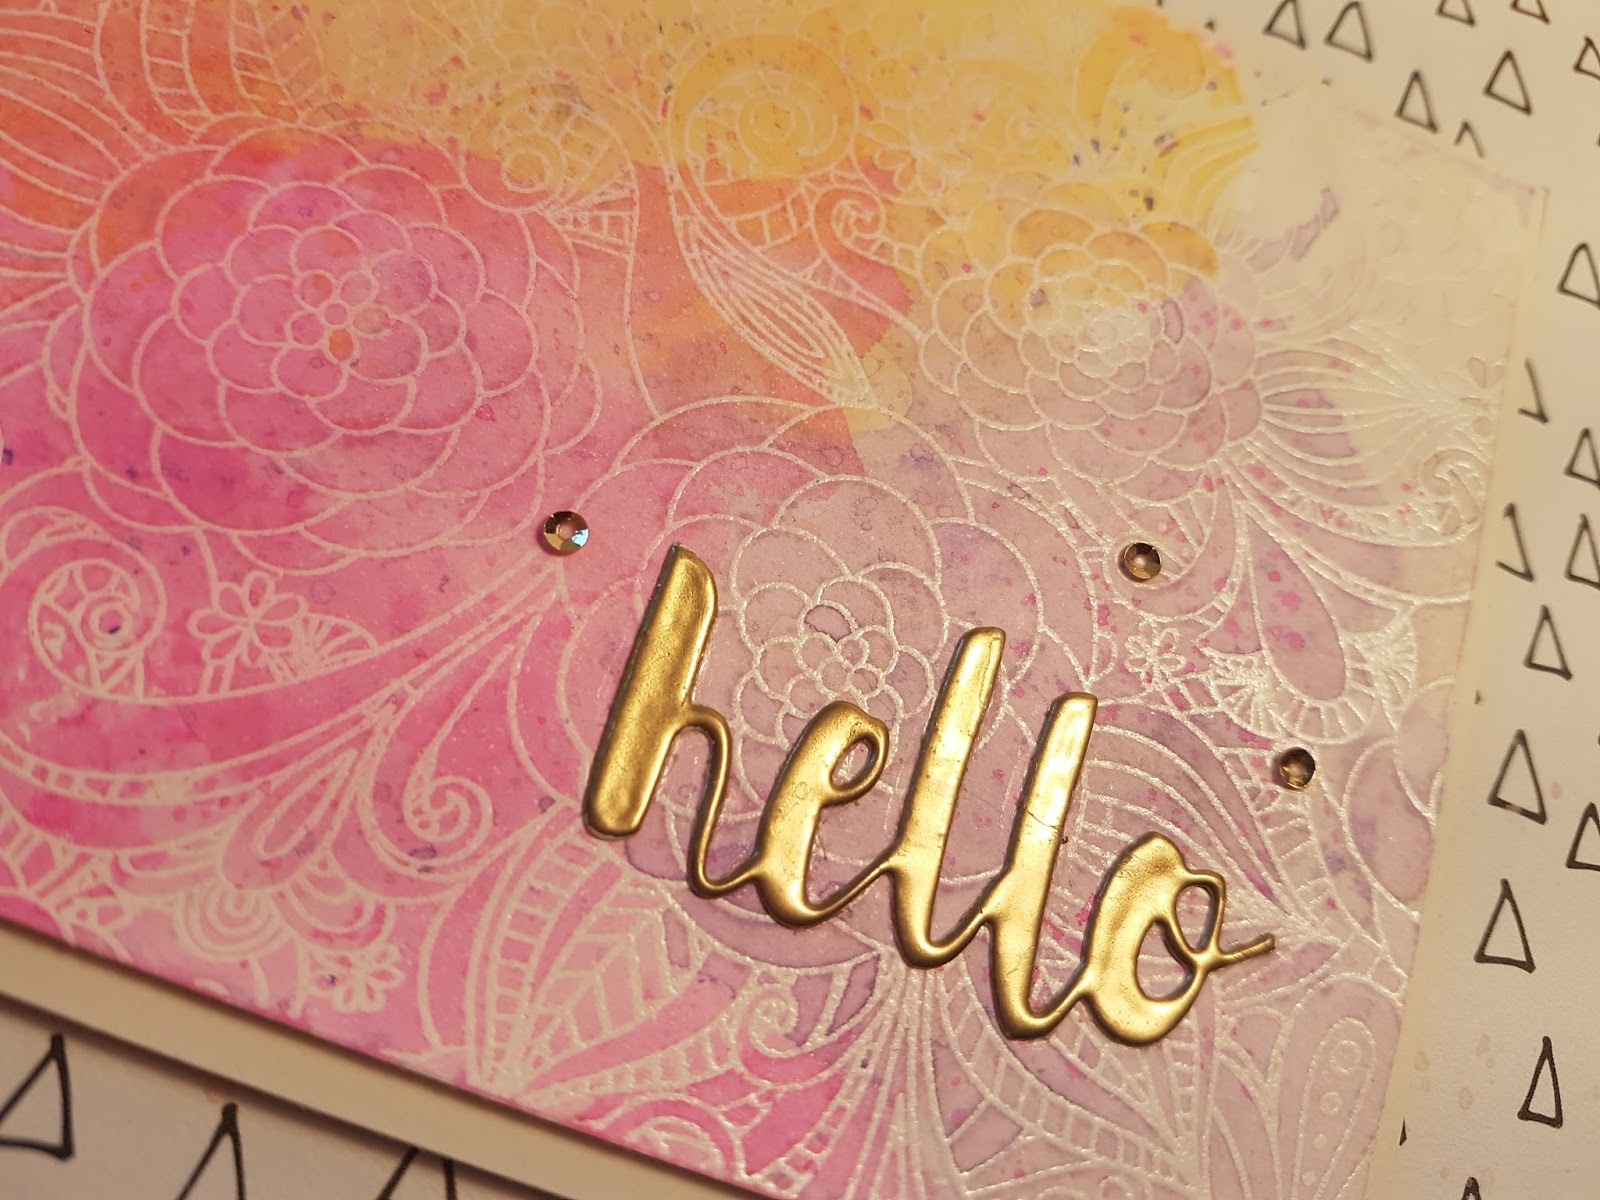
Hello card - My first card-making video!


Hi! Today I have a new card to share with you along with its video making! Yeeeahh! 😊

There are many reasons why I love card-making. One of them is that each card is a small project that can be finished quite quickly. Of course this holds if you have already decided what you are going to create and everything goes as planned! The second reason is that there are many different styles of card to try making and thus you can never get bored with it! There are also several techniques to try, learn and keep it if you like it or not.

For this card I use embossing (with embossing powder) & ink smooshing techniques, which I really like for card-making.

Here are some close-ups of the card:


You can watch the whole card-making video of the card at my Youtube channel:


Hope you like it! Thank you for watching! 💖

Supplies list: 


* background stamp: Floral Fantasy, My Favorite Things
* embossing ink: VersaMark
* embossing powders: white, WOW - gold, Zing!
* Tombow markers: #623, #725, #025
* die: Painted Hello, Simon Says Stamp


Sunday, 28 February 2016

Card - Time to Celebrate!


Hi! Welcome to my blog!

It's been a long time since I last posted a new project (although I've been making them!) and I feel totally out of rhythm here! But...I hope that it will all come back to me and that I'll manage to post everything new that I have. 

Today I have a new card, which combines some of my favorite techniques, like ink blending, embossing, use of vellum and a seam binding bow! It is quite easy to make, and it is a card that can be used for many festive occasions like birthdays, name days,  anniversaries, graduations and more!
So, if you like it don't hesitate to try making it!


For the background, I used the background stamp with embossing ink and then I embossed it with golden embossing powder. Then, I used three distress inks (mustard seed, wild honey and aged mahogany) to create the ombre effect using the Ranger's round ink blending tools.


I cut a strip of vellum to use as banner, I stamped my sentiment with black archival ink on the vellum and embossed it with clear embossing powder. I've placed it on my background panel, folded it over the edges and adhered it at the backside. This way the glue doesn't show through the vellum. 


Then, I made a double bow with seam binding ribbon at matching color and adhered it on the vellum banner.


Finally, to embellish it a little more, I placed some pearl gems close to the sentiment. I adhered the main card panel to a white card base and my card was ready! Quite easy, isn't it?!

I hope you like my new card. Thank you for visiting my blog, I'll be happy to get your comments!

LIST OF SUPPLIES:


Sunday, 20 December 2015

Mini Canvas - Merry Christmas!

Hi! Welcome to my blog and happy holidays!

Today I have a truly festive mini canvas to share with you! This is my first mini canvas, I really enjoyed making it and it didn't included any intricate painting at all! So if you want to make your own canvas without painting, this is one quite simple way!

I started by adhering 'soft' paper, like tissue paper and old book paper pieces at all the edges of the canvas, from the front to the back side. This helped to cover all the white space of the border of the canvas and make it look complete at the end. To do that I used gel mat medium between the paper and the canvas but also on the top of the paper to have a perfect coverage. 

For the background I used some paper pieces and I made a collage with them covering all the canvas surface. Again I used gel mat medium under and over the paper pieces and left it to dry completely. I also used some chevron and music notes washi tapes and some stamping to add interest to my background. Then I painted over the collage with watery white paint to tone down the background colors.

(click on the photos to zoom)

After it was totally dry, I used a stencil with some painted modelling paste and added the bubbles at some areas of the canvas. I wanted the bubbles to look gold so I mixed the modelling paste with some gold distress paint. But as my modelling paste is white, the gold paint color wasn't so bright metallic gold as it finally looks but it rather had a mustard shade. To make it look gold, I left the paste to totally dry and then I used the same gold distress paint with a brush to color the dried paste surface. It finally turned out GOLD! 


For my Christmas tree, I die cut scalloped circles of different sizes from a collection of papers with festive colors. I distress painted the papers edges, crinkled them to add dimension to them and put them together to the three different sized flowers. I added I gold gem to their center, made some shadow on the canvas with brown distress ink and glued the flowers on my canvas in a tree shape. To make the tree trunk I used some thick twine which I painted on top with some brown ink. 


To embody the tree and its colors with the background, I used watery distress paints and added a little bit of red and green colors to some areas of the background. Finally, I cut some stars of different sizes from a scrap paper with beautiful lettering. I distressed their edges with distress ink or glitter and I adhered them on the canvas using some golden string to make them look like hanging for the top and some foam tape.


For my quote, I used die cut letters from a black paper with small white patterns. 

Well that was my first mini canvas, I really enjoyed making it and I hope you like it! I think that mini canvases are a great idea for embellishing the house (this one for the holiday season!) and can be a beautiful gift for family and friends too!

With this mini canvas I participate to December's Challenge of the Pinterest Inspired Challenge blog
This challenge blog shares awesome inspiration ideas from the Pinterest and you can find it here! Check out this month's inspiration photo! Isn't it GORGEOUS?!!!


I also participate to the Simon Says Stamp Monday Challenge "Just a Pinch" as my mini canvas has just a pinch of gold shimmer and glitter which I really love for the season holidays, and to the Simon Says Stamp Wednesday Challenge "Die Crazy" as my first mini canvas is full of die cuts!!!               


SUPPLIES: 


Saturday, 10 October 2015

Card - Happy Halloween!


Hello dear friends and welcome to my blog!

Today I have a Halloween card to share with you! And it is quite special to me as in my country, Greece, we don't celebrate Halloween, but I love the Halloween theme and its colors and I love this card!

For the background I've used dusty concord Distress ink, using a circle mask made with the stitched circles die, to prevent coloring the space of the moon. After removing the mask, I used old paper Distress ink to lightly color the moon and to create the spooky clouds! 
I hand-cutted a piece of cardstock and painted it with brown Tombow watercolor pen to use it for the hill ground. I also stamped with potting soil Archival ink the plants on the background from the Docrafts the collector stamp set.


The pumpkin and the cute cat were stamped with the SSS Hey pumpkin stamp on watercolor paper and then colored with Tombow watercolor pens. After that, I hand-cutted the colored image, created its shadow with walnut stain Distress ink and glued it on the page. I've also used Distress crackle paint over the pumpkin to give it a more frightening look!


I have also created the spider web with its spider with a permanent black pen.


Finally, I've stamped the sentiment from the previous SSS stamp set over the moon and drew a spider coming down from it again with black permanent pen.


I love how this card came out, spooky and cute! Hope you like it too! I'll be happy to get your comments or questions.


SUPPLIES:


Thank you for visitng my blog!


Monday, 6 July 2015

Card - Coffee Lover!


Dear friends, hi! Welcome to my blog!

After moving our home and trying to put everything in its new place, I, finally(!), managed to make some time for a new card! Our new home still needs a lot of work and time to become completely and entirely functional, but hey! my craft place is quite ready and I really need my creative time to relax and be happy! 

For a long time I wanted to create a watercolor background for my card but for some reason I couldn't make one that I really liked. After watching many video tutorials on how to make a watercolor background and trying different techniques, I believe I've found the one that works for me! 
So here is my new card with the watercoloring background! 

(click on the photos to zoom)

The process for creating this card is the following:

1. To create the watercolor background I've adhered my watercolor paper onto a thick cardboard, using removable paper tape, to avert paper buckling. With a big brush, I watered all the paper surface. I placed, on a transparency, ink from two Tim Holtz Distress ink pad colors, the Worn Lipstick and the Shabby Shutters, sprayed a little water on them, and with a smaller brush I started picking ink and placing it onto the watered paper. I've tried to avoid blending the two colors together since this would result in a muddy brown color! After my first layer of colors I heat setted the colors with my heat gun. I continued to place ink on the paper and heat-setting until I was satisfied with the result. Then I removed the paper tape which left the white border on the paper. I have seen this technique of watercoloring from the amazing Kristina Werner and you can watch a sample of her watercoloring background process here.

2. Using the Potting Soil Archival Ink, I stamped two images from the Prima Coffee Break Cling stamp set, onto some patterned paper from the Lost & Found paper collection of My Mind's Eye, and fuzzy cutted them.

3. I used a matching colored ribbon to make a bow on the handle of the coffee pot.


4-5. The cup stamp that I've used comes along with a sentiment and some coffee steam, thus, I have masked it with some post-it notes in order to stamp on the background only the cup and the steam of the coffee. I also stamped the coffee pot. 

6. I made a banner with some polka dot paper from the same paper collection, where I have stamped with the Potting Soil Archival Ink the sentiment and some coffee seeds from the previous stamp set. I've also used ZING Clear embossing powder to emboss the sentiment. 

7. I adhered my cutted images of the cup and the pot on the stamped ones, using Galleria Matte Medium for the cup and adhesive foam tape for the coffee pot to add some dimension to the card. I used a watered brush and ink from the Tombo Art watercolor marker 969 to make some shadow around the cup and under the pot. 

8. To add some details on the card, I glued three matching green gems and used the ZIG Wink of Stella Glitter Clear marker on the pot's dots.

9. Finally, I punched and inked with Worn Lipstick distress ink a small heart, I glued it on the banner and placed the banner with the sentiment on the bottom of the card using adhesive foam tape.

And here are some close-ups of the card.


And an other final view!


That was my card for today, I hope you like it! I would be happy to get your comments or any questions! 

With this card I participate into the Simon Says Stamp Wednesday Challenge "We're Going Dotty!"!

Thank you for visiting my blog!


Sunday, 3 May 2015

Art Journal Page - Childish Dreams!

Hi! Welcome to my blog!

Today I have a new art journal page to show you. This page was inspired by Tamara Laport and her new awesome art work which can be found here
I have to admit that before meeting Tamara's art and watching some of her videos, my girl-painting skills were reeeeeaaaalllyyy poor! That made me sad as I loved seeing other peoples girl-painting but I couldn't make one myself (at least not one that I would like!). After studying Tam's videos and techniques on sketching, painting and shadowing a girl's face, I started feeling more confident about it and this journal page is my second try on it! And I have to say that, although I still find points that are not "correct" and that need more "work", I really like the outcome! Also, I can see the progress between my previous projects (see here and here) and this one, and this fact makes me hope for even better results in the future! I hope you will like it too!


(click on the photos to enlarge)

Here is a closer look on the girl...


and to the right page! I so LOVE this quote!
                

To make this journal page, I initially drew the girl's face with graphite pencil. Then, I colored the background using some stencils to give some pattern to it. I cutted some scap papers with different colors and patterns into small pieces and adhered them to different areas of the page. Then, I used some watered gesso and a brayer to tone down the background. After that, I painted the girl, I sketched and colored the flowers and I wrote the quote with black pen. Finally, I embellished my page using a stars stencil and the butterfly stamp, which I doodled with a black and a white pen.

In this photo you can see the different patterned papers and the small flower drawn on the girl's neck. 


And here is the cute butterfly stamp! You can see all the texture from the paper pieces and the gesso layer, and the background coloring through the stencil.


Well, that was my page for today, I hope you like it! I would be happy to get your comments!

With this art journal page I participate into two great challenges! The Simon Says Stamp Monday Challenge "Anything Goes" and the Simon Says Stamp Wednesday Challenge "Anything Goes"! I love them both and I'm so happy that this week I have two chances to win their great gift! Keep fingers crossed!


PRODUCTS LIST:
  • Prima Finnabair Stencil "Stars"
  • Tim Holtz Stencil "Clockwork"
  • Inkadinkado clear stamps "Fancy That"
  • Lefranc & Bourgeois Gesso
  • Dylusions Ink Spray "London Blue"
  • Neocolor II watersoluble crayons
  • Winsor & Newton Galeria Acrylics (Permanent Magenta, Pale Olive, Cerulean Blue Hue, Pale Terracotta)
  • Faber-Castell Broadpen 1554 black pen
  • Sharpie white pen
  • Brayer


Friday, 27 March 2015

Card - Spring Happy Birthday!


Hi, welcome to my blog!

Today I have another birthday card to share with you! Although I have used paper cuts from an autumn collection, white, orange, green and brown colors remind me of spring and I love to call this card spring happy birthday card! This card was inspired by the amazing Kristina Werner. Kristina is a professional graphic designer and papercrafter and I really love her work! You can find her original card here.

Making this card was quite a challenge to myself, as I had to try many alternative techniques, some totally new to me. The first alternative technique was making the embossed background not with an embossing folder but with a stencil. For this one, I used my Big Shot machine by placing one cutting pad, a sheet of felt, my cardboard, the stencil and on the top the second cutting pad. I love the embossing result! 

(click on the photos to enlarge)

For the fox and the fawn, I stamped them on watercolor paper and colored them using distress inks and a water brush and watercolor markers. This was my second try for watercoloring stamped images (you can find my first attemp here) and I have to admit that I'm not quite satisfied yet. But we all need to try, right?! After coloring the images, I hand-cutted them and colored the white edges.


I made the sentiment by stamping with brown archival ink on velum and embossing it with clear embossing powder. Archival ink isn't the best choice for stamping on velum but as I didn't have a brown StazOn ink or a brown embossing powder, I had to use it and it hold quite well on the velum. 


For the shaker window, I have used two sizes of scallop circle dies to cut the paper border. In order to achive depth for the window, I have also die cutted with the dies a piece of foam sheet and glued it under the paper border.


For the content of the shaker window, except from the ordinary sequins, I love using other small things that I can fit inside, like wood veneer embellishments, small paper die cuts, and beads.


With this card I participate in the challenge "Anything Goes" of the Simon Says Stamp Wednesday Challenge blog!


That was my card for today, I hope you liked it! I would be happy to get your comments or any questions. Thank you for visiting!


PRODUCTS LIST:

  • Sizzix Big Shot machine
  • Sizzix Circles, Scallop 8 dies
  • Memory Box Scraped Paint Stencil
  • Bo Bunny 6x6 paper pad Autumn Song Collection
  • Lawn Fawn Clear Stamps Into the Woods
  • Ranger Distress Ink spun sugar, tea die, walnut stain
  • Tombo ABT markers 899, 977
  • Ranger Archival Ink Potting Soil
  • Zing! Embossing Powder Clear
  • Hero Arts "Find Joy" Clear Stamp Set
  • Simon Says Stamp White Cardstock
  • Ranger Tim Holtz Distress Watercolor Cardstock
  • Doodlebug Design doodle twine take note
  • Studio Calico Wood Veneer Shapes Tiny Stars
  • Martha Stewart Flower Shower Punch Around the Page Set
  • Moon Shaped and Circular Sequins
  • Velum


Saturday, 14 March 2015

Card - You're the greatest!


Hi! Welcome to my blog! 
Today I have a new card to show you and this one is of romantic style! My mom loves romantic and shabby chic style and this one is for her!  If you would like to make a similar card, the how-to-steps for making it are the following:

1) Use a watercolor cardstock, stencil with white modelling paste your favorite background pattern and let it dry.

2) Apply with a brush two or three matching watercolors on the background, spray it with water and let dry. You can repeat this step until you are satisfied with the background coloring. Make a border to the background with a watercolor too.

(click on the photos to enlarge)

3) Make your focal point like a heart, a butterfly, a flower etc. using patterned paper of matching colors, attach it on your background using foam tape, make a sentiment banner and place it on it too. You can embellish it more if you feel like it by coloring it and using some gems.


4) Use some of the background colors to color a ribbon and tie it into a bow. Use some embellishments like twine and brands and attach it on your card.


5) Glue your card panel on a cardstock and you're finished! Here is the resulting card again! I hope you like it!


Thank you for visiting, I'll be happy to get your comments!

PRODUCTS LIST:
  • Simon Says Stamp White Cardstock
  • Ranger Tim Holtz Distress Watercolor Cardstock
  • Galeria Modelling Paste
  • Ranger Tim Holtz Distress Ink - old paper / worn lipstick / scattered straw
  • Tim Holtz idea-ology - Crinkle Ribbon
  • The Crafters Workshop 6x6 Stencil - Mini Peacock Feathers
  • My Mind's Eye 6x6 paper pad - Lost & Found
  • Elle's Studio Sentiment Tags
  • Ranger liquid pearls - Flamingo


Saturday, 27 December 2014

Art Journal Page - My Angel

Welcome to my blog & happy holidays to all!
I wish you are having a really great time as a totaly new year is about to come!

Today, I have a special art journal page to share with you, "my angel"! "My angel" is the result of an exiting free course that a have taken, called "Art, Heart & Healing" which is offered by the amazing Tamara Laporte! Tam is one of the most talented and kind people I've ever met through the internet and I'm so glad that I have found her. Art, Heart & Healing is a GREAT course that really helped me to open my mind and heart to art and its healing part and, as I'm quite new to it, to develop my skils a little bit more. You can find Tamara's art here and all the information about the Art, Heart & Healing free course right here.

"My angel" expresses a healing & helpful power that reminds me of what I really need to be happy and, most importantly, to be open to receive it!


Here is a closer look on my angel's face...At last, I've managed to draw and paint a face that I really like! I know it is not perfect but I like it...!!!


The wings feathers were initially sketched with a pencil and then they were covered with modeling paste (using a size 5 rounded brush) which gave them a great texture.


The texts were written with a white Sharpie pen and for the angel's halo and the shimmering dress (which really doesn't show in the photos but is in real view) I've used a metal pearlescent acrylic paint.


I hope you like it! I'll be happy to get your comments. 


Wish you all a 

HAPPY AND CREATIVE NEW YEAR!!!  


Sunday, 31 August 2014

Art Journal Page - Girl's face - Purpose of art


Καλώς ήλθατε στο blog μου!
Σήμερα έχω να σας δείξω άλλη μια art journal page, με κάτι καινούργιο για μένα (και αυτή τη φορά!), την πρώτη μου (περίπου) προσπάθεια να σχεδιάσω και να χρωματίσω ένα κοριτσίστικο πρόσωπο! Η αλήθεια είναι ότι έχω προσπαθήσει και άλλες φορές να ζωγραφίσω κοριτσίστικο πρόσωπο αλλά το αποτέλεσμα δεν ήταν αρκετά ικανοποιητικό για μένα. Αυτή τη φορά όμως, και με την βοήθεια του quote (!), αποφάσισα να το δοκιμάσω και ό,τι γίνει και το αποτέλεσμα ήταν αυτό!

Welcome to my blog!
Today I have one more art journal page to show you, with something new to me (yes, this time too!), my (almost) first try to sketch and draw a girl's face! The truth is that I have tried to draw a girl's face before, but the result wasn't very satisfying for me. But, this time with the help of the quote (!), I decided to give it a shot to my art journal book and this is what I came up with! 


Τα χρώματα που χρησιμοποίησα για να ζωγραφίσω το πρόσωπο ήταν κυρίως ακρυλικά, μαρκαδόροι σινικής μελάνης, μαρκαδόροι νερού (κυρίως για τις σκιές) και μαρκαδόρος λευκού pigment μελανιού. Αν και δεν το περίμενα, όλα τα χρώματα ήταν αρκετά "ανεκτικά" στα λάθη και στις διορθώσεις, και έτσι με μερικές προσπάθειες κατάφερα να πάρω αυτό το αποτέλεσμα.

The inks that I've used to draw the girl's face were mainly acrylics, indian ink pens, water-soluble pens and a white pigment ink pen. Although I didn't expect it, all inks were quite "forgiving" to errors and corrections, and thus after some tries I got this result.


Για την διακόσμηση της σελίδας χρησιμοποίησα modelling paste, ένα από τα αγαπημένα μου πλέον υλικά, καθώς δίνει βάθος και υφή στη σελίδα! Κάποια σημεία τα χρωμάτισα από πάνω ώστε να ταιριάζουν με το background, είτε με ακρυλικό χρώμα (σε αυτή την φωτογραφία)...

To embellish my page I used modelling paste which is one of my favorite materials as it gives depth and texture to the page! Then, I coloured some points of the paste with acrylics (shown in this photo)...


είτε με τα gelatos, με τα οποία επίσης χρωμάτισα το πλαίσιο της σελίδας.

or with gelatos, which were also used to make the border of the page.


Το quote της σελίδας, η συγκεκριμένη φράση του Πικάσο, μου άρεσε πάρα πολύ και ένιωσα ότι είχε πολλά να μου δώσει οπότε την διάλεξα για την σελίδα μου!

I love this quote of Picasso, I feel that it has so many things to say to me, so I've chosen it for my page.


Ελπίζω να έχει κάτι να πει και σε σας! Ευχαριστώ που επισκεφτήκατε το blog μου!

I hope you liked this quote and my page! Thank you for visiting my blog! I'll be happy to get your comments!


Thursday, 24 July 2014

Card - Happy summer time!


Καλωσήλθατε στο blog μου! 
Κατακαλόκαιρο πια και δεν θα μπορούσε να υπάρξει μεγαλύτερη έμπνευση από τον ήλιο και την θάλασσα! Η νέα μου κάρτα εκτός από άκρως καλοκαιρινή, είναι επίσης και shaker card (η πρώτη μου!).

Welcome to my blog! 
We are in the middle of the summer and there couldn't be more inspiration than that from the sun and the sea! My new card except from totally summery is also a shaker card (my first one!).


Για το χρώμα και το εφέ των κυματισμών στο φόντο πίσω από το "παράθυρο" της κάρτας χρησιμοποίησα distress paint ακρυλικό χρώμα πιέζοντας και κινώντας κατάλληλα το σφουγγαράκι ώστε να δημιουργήσει αυτό το αποτέλεσμα.

For the colour and the wave effect on the background behind the "window" of the card, I have used distress paint and pressed and moved the sponge properly to create this result. 


Και μια όψη του κειμένου της κάρτας από κοντά!

And here is a view of the sentiment, made using the SSS "happy" die cut and some alphabet stamps!


Με αυτή την κάρτα συμμετέχω στην πρόκληση "A mid-s
ummer's challenge..." στο
Simon Says Stamp Monday Challenge blog!
Ευχαριστώ που επισκεφθήκατε το blog μου! Καλό καλοκαίρι σε όλους!

With this card I'm taking part to the challenge"A mid-summer's challenge..." at: 
Simon Says Stamp Monday Challenge blog!

Thank you for visiting my blog, I'll be happy to get your comments! Happy summer-time to all!