Saturday, 14 March 2015

Card - You're the greatest!


Hi! Welcome to my blog! 
Today I have a new card to show you and this one is of romantic style! My mom loves romantic and shabby chic style and this one is for her!  If you would like to make a similar card, the how-to-steps for making it are the following:

1) Use a watercolor cardstock, stencil with white modelling paste your favorite background pattern and let it dry.

2) Apply with a brush two or three matching watercolors on the background, spray it with water and let dry. You can repeat this step until you are satisfied with the background coloring. Make a border to the background with a watercolor too.

(click on the photos to enlarge)

3) Make your focal point like a heart, a butterfly, a flower etc. using patterned paper of matching colors, attach it on your background using foam tape, make a sentiment banner and place it on it too. You can embellish it more if you feel like it by coloring it and using some gems.


4) Use some of the background colors to color a ribbon and tie it into a bow. Use some embellishments like twine and brands and attach it on your card.


5) Glue your card panel on a cardstock and you're finished! Here is the resulting card again! I hope you like it!


Thank you for visiting, I'll be happy to get your comments!

PRODUCTS LIST:
  • Simon Says Stamp White Cardstock
  • Ranger Tim Holtz Distress Watercolor Cardstock
  • Galeria Modelling Paste
  • Ranger Tim Holtz Distress Ink - old paper / worn lipstick / scattered straw
  • Tim Holtz idea-ology - Crinkle Ribbon
  • The Crafters Workshop 6x6 Stencil - Mini Peacock Feathers
  • My Mind's Eye 6x6 paper pad - Lost & Found
  • Elle's Studio Sentiment Tags
  • Ranger liquid pearls - Flamingo


Saturday, 7 March 2015

Card - You mean so much to me!

Hello! Welcome to my blog!

Today I have a new card to show you. This one comes out very late, as it was made for the Valentine's day, but you know what? We can give a card to our loved ones everyday and not just for the Valentine's day, right?!

What I sometimes find difficult to make, is to combine a love and appreciation theme of card, with a masculine style. So this card started with a white cardstock base but it looked so...not masculine! And then, as my hubby's favorite color is black, it 'hit' me. Let's introduce some black here! Then, it all came out easily. The black background would match perfectly with a combined black banner, and this is the result!

(click on the pictures to enlarge) 

I love the texture of the red painted modelling paste!


I have also used a matching brad that says "you're my treasure" and a bow made from thick twine.


And here is an other view of my love-masculine card!


I hope you like it and got inspired to make yours! I would be happy to get your comments or answer your questions. Thank you for visiting my blog!

PRODUCTS LIST:
  • Simon Says Stamp white cardstock 
  • Black canson paper
  • Galeria modelling paste
  • Martha Stewart "habanero" satin acrylic paint (red paint)
  • Prima "Stationer's Desk" paper pad
  • Lawn Fawn "Peace Joy Love" paper pad
  • Bo Bunny "Altitude Collection" paper pad
  • Thick twine (from handware store)
  • Prima "Stationer's Desk" brads
  • Simon Says Stamp "Postage Stamp Edge Frames" Craft Dies
  • WOW Opaque bright white embossing powder 
  • Hero Arts "Find Joy" clear stamp set
  • Lawn Fawn "Into the Woods" clear stamps


Sunday, 1 March 2015

Proud for...!

I'm so happy for this blog post! 

With my last art journal page "Let Go" I have won the spotlight designer's badge from 
the Simon Says Stamp Team! 

And here it is:


Thank you so much for picking up my project and for the great comments! 

Wish you all many happy and creative moments!


P.S. Stay tuned! New creations are coming soon!


Saturday, 14 February 2015

Art Journal Page - Let Go !


Welcome to my blog & happy Valentine's day!


I know that some of you might not feel like celebrating and, for that reason, I wish my art journal page will make you think of what is that takes joy and happiness away from you and just let it go! 


(click on the image to enlarge)

For the background I used white fluid acrylics. Then I stenciled the pink flowers with ink spay and I stamped using a text stamp with black archival ink . I doodled with a black pen and added some washi tape. Then, I made the black border and the drips with watered acrylics.


I made a collage with the woman figure (the image is part from a Heye gothic puzzle picture which I love) and shade it using black indian ink pen and my finger to smudge the lines.


 I printed my quote, cut it in pieces and distressed the borders with distress ink. I also stamped the words "let go".  


Then, I used modeling paste coloured with black and white acrylics and the flower stencil to make the textured flowers that give dimension to the page. Finally, I used a pearlescent fluid acrylic to make some polka dots floating on my page!


Well, that was my art journal page for today, I hope you like it! Thank you for visiting my blog, I'll be happy to get your comments.

With this art journal page I'll participate in the challenge "Red + Pink" of the Simon Says Stamp Monday Challenge blog! 

PRODUCTS LIST:

  • Ranger Distress Paint - picket fence
  • Ranger Dylusions ink spray - bubblegum pink
  • Ranger Dylusions Stencil - Flower Medley Small
  • Bo Bunny stampset - It is written
  • Stampers Anonymous stampset - Worn Text
  • Kaiser Craft printed tape 
  • Galeria Acrylic - Mars Black
  • Galeria Modelling Paste
  • Tim Holtz Distress Ink - weathered wood
  • Ranger Archival Ink - Jet Black
  • Heidi Swapp Stencil - polka dots
  • Darwi Metal Acrylic - pearlescent 

Sunday, 25 January 2015

Mini Handmade Art Journals!


Welcome to my blog! 

Today I have two handmade mini art journals to share with you and my very first video! yeahhhh!!!! 
These mini art journals were inspired by the amazing Jennifer from jenofevedesigns and you can find the instructions for the original idea here. The mini art journals can be used as traveling journals, as they can be easily carried, or even as mini notebooks! They are also a great gift idea!

The covers of these mini art journals are made from mixed media paper covered by pieces of old paper and then distressed and sealed with matte multi-medium. 
For the journal binding I have used a gros-grain ribbon with tiny white polka dots!


There is an inside pocket on the front cover filled with small tags and papers to embellish the journal. I have distressed the edges of the pages to match the journal coloring and give a vintage look to them, and I have also glued some small old paper pieces on them. 


There are three paper pockets with tags in the journal, made from patterned paper. These can be used for notes and journaling.


Inside the back cover, there are two plastic pockets made from document folders and washi tape. These are keeping more patterned papers pieces and some journaling tags to embellish the journal.


This is the cover of my prototype mini art journal, which slightly differs from the previous one.


You can watch the video flip of my mini art journals with all the details here :


I hope you liked these mini art journals and got inspired! I'll be happy to get your comments. Thank you for visiting my blog!


Monday, 12 January 2015

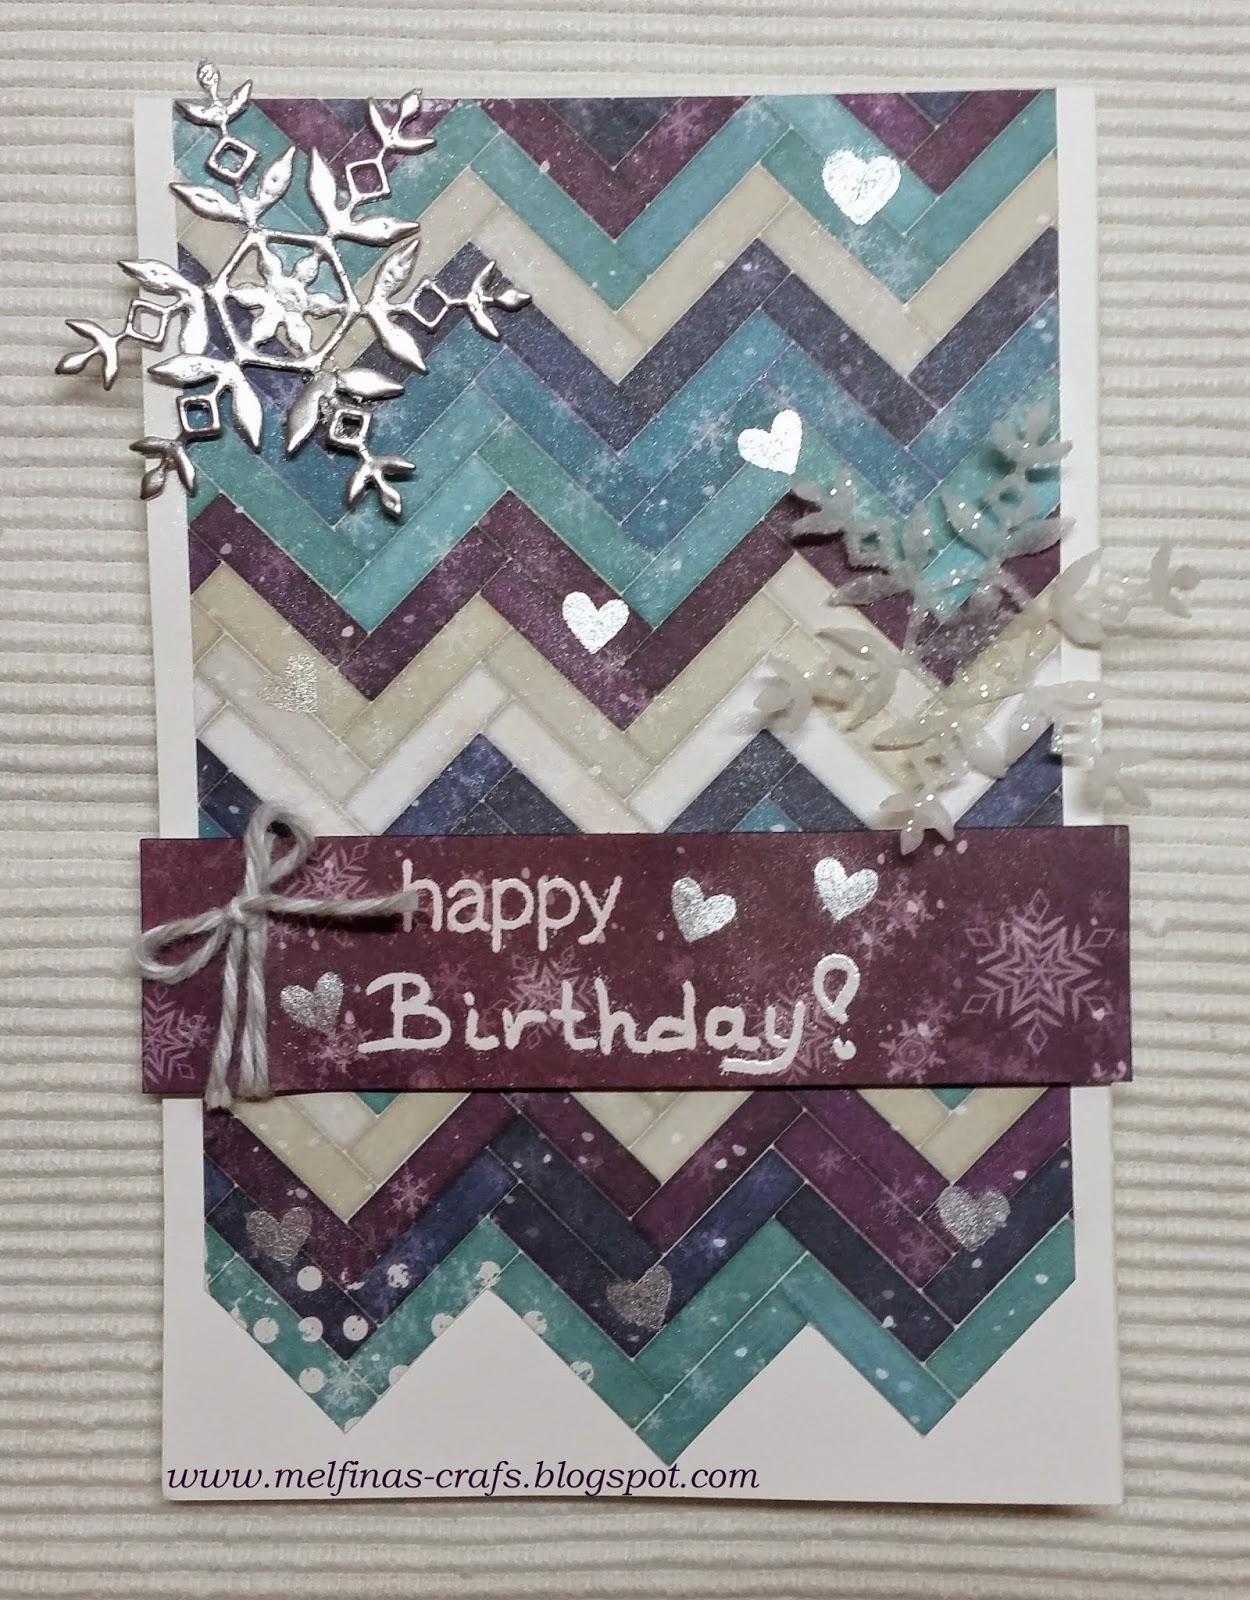
Happy New Year & Card - Winter Birthday Card!


Welcome to my blog and...


HAPPY NEW YEAR!!! 


Wish you a happy and creative new year, full of joy and peace!


Well, this is my first blogpost of the year and I have a Winter Birthday card for you! The background paper is from the Bo Bunny Altitude Collection and I love it, as it has all my favorite winter colours! 


To embellish my card, I used two die cutted snowflakes. For the left one, I used paper which then I embossed with silver embossing powder. I also used grey-white doodle twine to make a bow which coordinates with the card colours. 


The right snowflake was die cutted on velum which then was embellished with glitter. I love its frosty look!


For the sentiment I made a paper banner for the same paper collection, on which I embossed my wish, and then glued it with foam tape on the background. I also used a heart shaped stamp and perfect pearls to make the little shinny hearts all around!


That was my card for today, I hope you like it! I'll be happy to get your comments!

PRODUCTS LIST:

  • Bo Bunny 6x6 paper pad altitude collection
  • Doodlebug doodle twine "take note assortment"
  • Simon Says Stamp Kate Snowflake die
  • Simon Says Stamp white cardstock
  • Ranger embossing powder silver
  • Ranger Tim Holtz Distress Glitter clear rock candy
  • Ranger Perfect Pearls perfect pearl
  • Ranger Emboss It Pens
  • Lawn Fawn Trim the Tree clear stamps set